
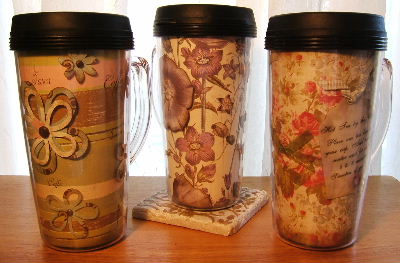
Here are a couple of cans that I made up today - Baby theme. I used a variety of papers and fibers. Cricut the letters, flowers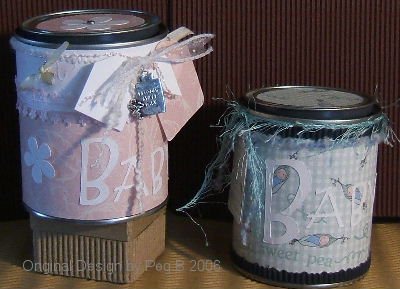 , and tags. I've found that using a spray adhesive to apply the main background papers works great. I would like to find a spray adhesive that doesn't have such awful fumes, though! Ick!! When I used Mod Podge for the first layer, I struggled with wrinkles and buckling. So, in the end I'm happy with the spray. To apply little letters I either run them through the Xyron, or use the Tombow Mono Multi liquid glue. Love that stuff.
Have a great Halloween tomorrow! I'm off to decorate!
October 30, 2006
Baby Daze
October 29, 2006
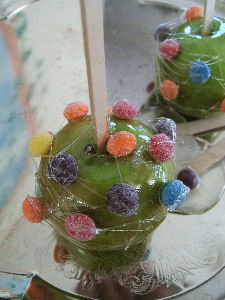
An Apple a Day
 Ooooo... it's looking like fall!
Here are a couple of my projects I made today:
To the left are candied apples...
and below...
Homemade caramel-walnut-milk & white chocolate covered apples... Mmmmmmmmm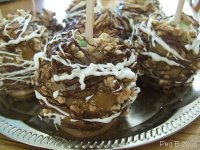
October 27, 2006
Clowns & Angels
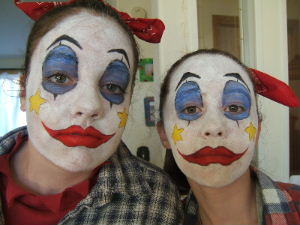 It's been an interesting week... a week of firsts. At the left is my first attempt at face painting. :) My dear friend's daughter and her friend went to a Halloween dance as rodeo clowns!! It was a fun learning experience doing their faces! I must say that they're much prettier under the makeup!
My other big first is something that I never dreamt that I would ever do. I signed on to be a consultant for a stamping/scrapping company - The Angel Company - TAC. I fell in love with their stamps and other goodies! I'm eagerly waiting on my first shipment of stamps and papers. I just can't wait to get them and start playing! One of the best things that have come out of this is that I met a new neighbor (an Angel) just a few streets away that helped me with my application process. I think that we'll have a lot of fun together in the future stamping and scrapping!
Have a great weekend!!
October 25, 2006
"Fall"ing For You
After doi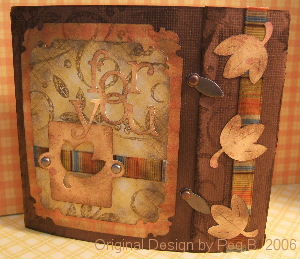 ng so many Christmassy things lately, I was feeling in the mood for fall last night. Cardstock is a chocolate Bazzill - love the texture of Bazzill... The leaves and "for you" are cut on my cricut. Distressed with my trusty walnut stain distress ink. The background stamp is a Stampin' Up stampin around - leaves and swirls. Ribbons were from the Target $ bin. :) Happy Fall!
October 23, 2006
October 22, 2006
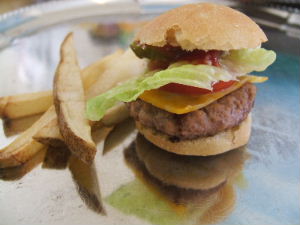
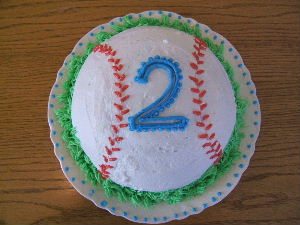
Bitty Baseballs & Burgers for the Birthday Boy
It was party day today for the 2 year old in
the house. I made miniature burgers - buns and all-, homemade fries and a baseball cake. The cake certainly isn't as detailed as most of my cakes, but for a bitty boy that loves balls, it was a hit! The surface is a bit "uneven"... a hem... little fingers just couldn't keep out of if!! I fixed it a couple of times before I remembered to take a picture! :)
I've been crazy busy working on projects for the upcoming craft sale. I'll post some of the goodies as I finish them.
October 20, 2006
Memories
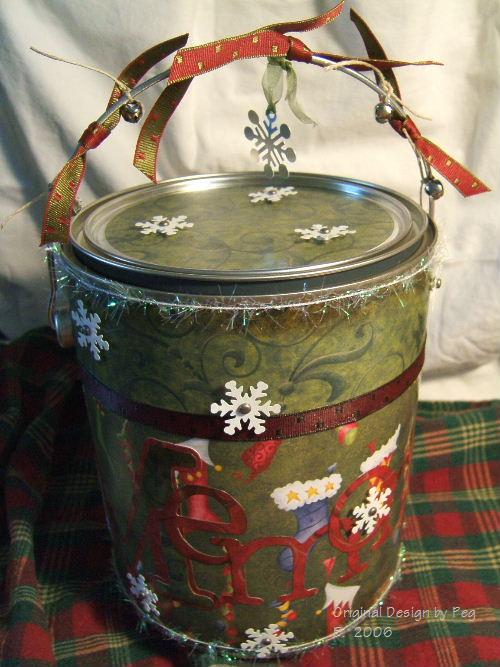 I had a heck of a time trying to get a decent photo of this can. I think it looks better in "real life". Oh well! I used patterned papers, ribbons, and other embellishments. I cricut the letters for "Memories" and used mod podge to seal it.
eToday was my baby's 2nd birthday. He's just growing up so fast. Always wants to do what his big brothers are doing... and many times does! I felt a bit sad today knowing that he is my last baby, and pretty much isn't a baby anymore! Thinking back to his birth brings back a lot of precious memories. He was my second home birth and it was near perfect. I'm one of those crazy gals that love giving birth. I spend 9 months sick and miserable, but when it comes to the birth I truly enjoy it!
Happy Birthday sweet boy.
October 18, 2006
Circle of Love
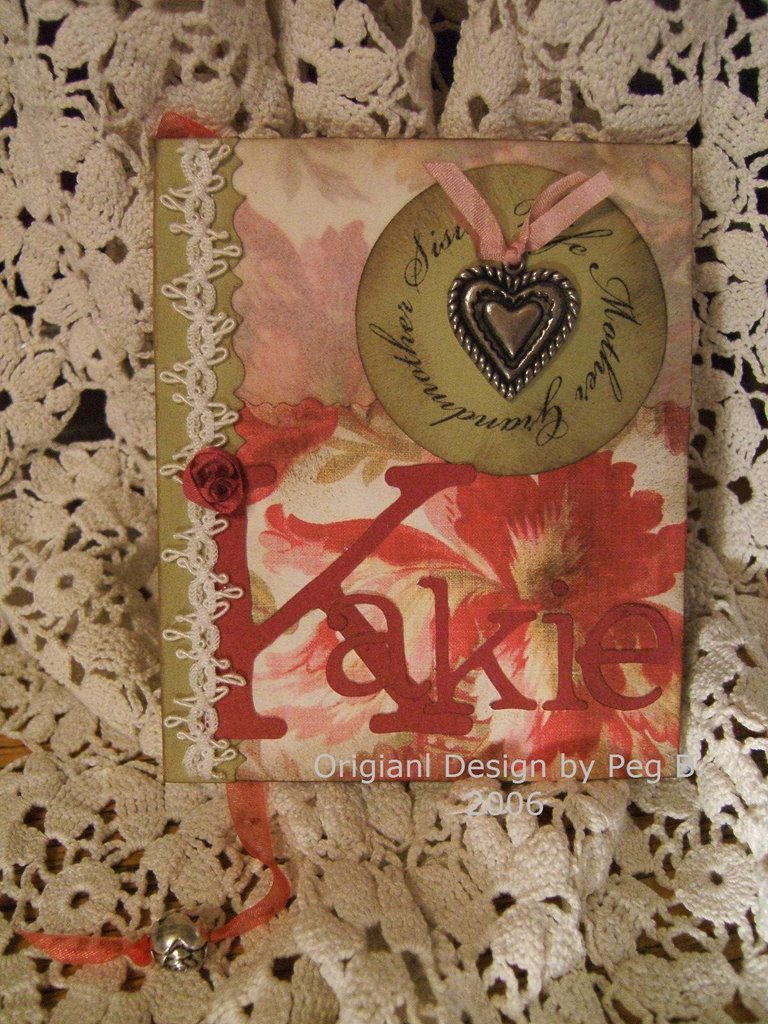 I worked on another miniature book today - commissioned by a friend for her Grandmother. I used a beautiful Anna Griffin floral paper, vellum, sage green & deep red card stock, 3 different fibers and a rose bead for the bookmark ribbon. The heart was a special piece that the granddaughter wanted included. I used my cricut with the doodletype font for the letters.
Well, I've agreed to be part of a craft sale in 3 weeks... I'm starting to think that I may be more than just a little crazy!
October 12, 2006
Tiny Alterations
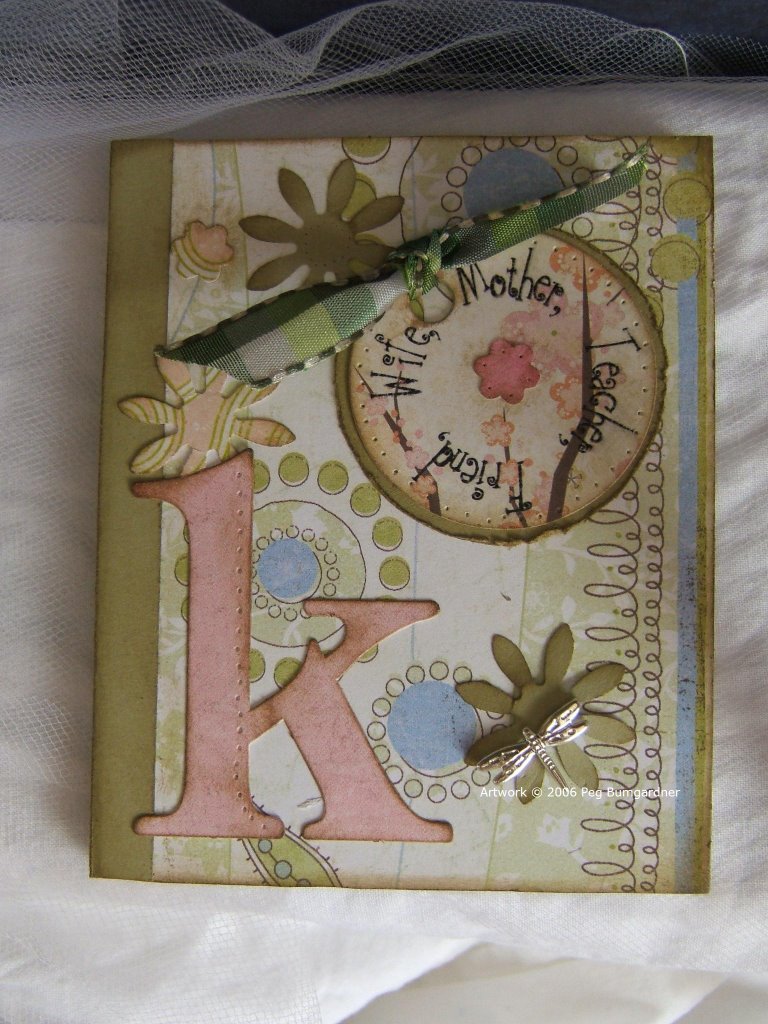 Altering these mini theme books are a load of fun! For this one I again used Basic Grey papers. Using the Xyron machine to run the components through first, makes it really quick and fun! Flowers were punched, and the monogram and tag were from BG. I used the printer made rub-on trick again on the tag. I distressed all edges with walnut stain distress ink. All in all it measures about 4 1/4 x 3 1/2.
October 11, 2006
Treasured Memories
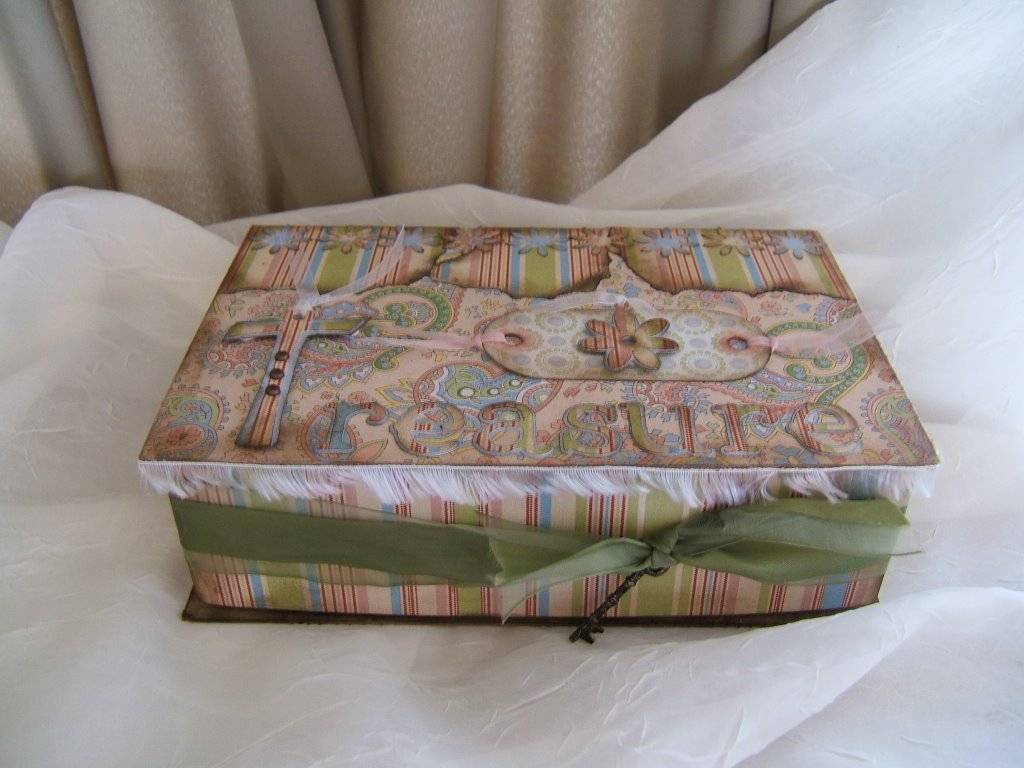 This is a special box that I've kept for many years. I finally decided that it was time to alter it's apearance, and use it. I received it from the man that
was the first one to ever give me chocolates for Valentines day. My dear Grandpa Ernie. :) I never knew either of my Grandfathers, and Ernie is my close friends Grandfather. So, I adopted him. I altered the box with Making Memories papers, fibers, and cut the letters out with my Cricut.
It's time to start another busy day! This is Max's art class day. He's taking a 2 hour art class every week at a local art studio. He's loving it!
Have a terrific Tuesday!
October 10, 2006
Birthday Fancies
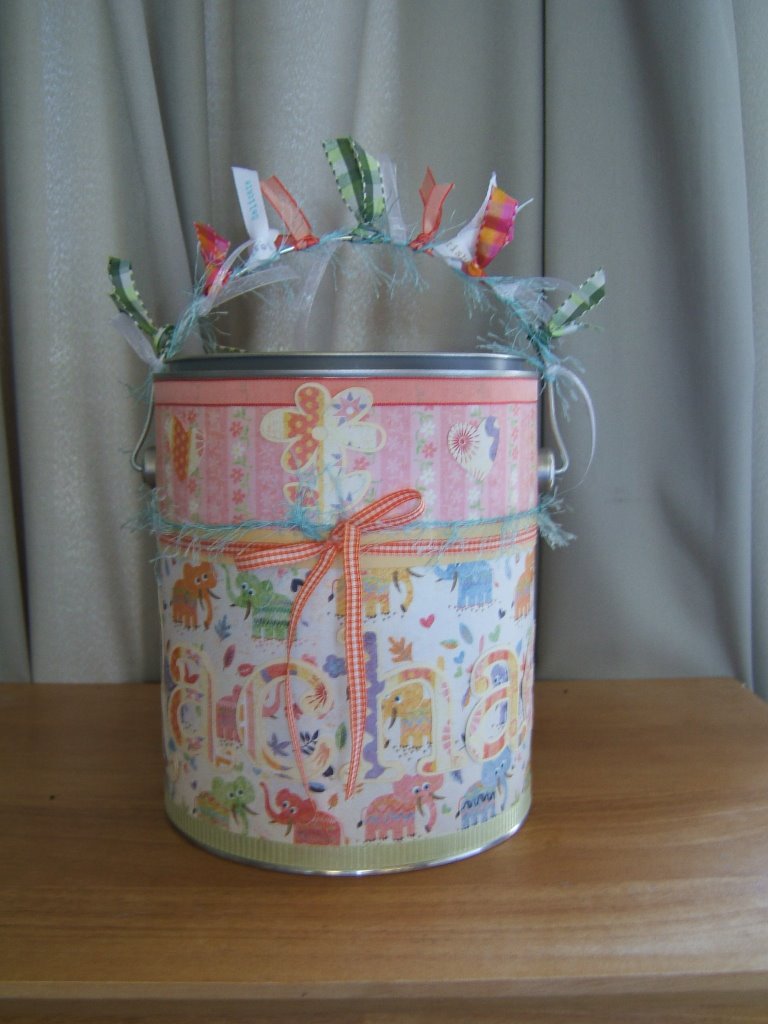 Here is my latest project.
It was created with Basic Grey papers, various ribbons, and lettering done by my beloved Cricut. It was such a fun project for my dear friend's daughter who just turned 1. Happy Birthday Rachael!
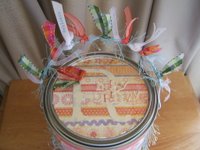
And what might be in the pail? Well, with 3 of my son's help we made a nursery rhyme book - illustrations done by them. I used a Basic Grey matchbook kit, along with ribbons and tags. I used a technique of making my own rub-ons for the first time. I just love the possibilities of it. I used it on the little tags hanging from the book. If you haven't tried it, basically all that you do is print a mirror image onto clear acetate, wait a few minutes, and then rub it onto your paper. 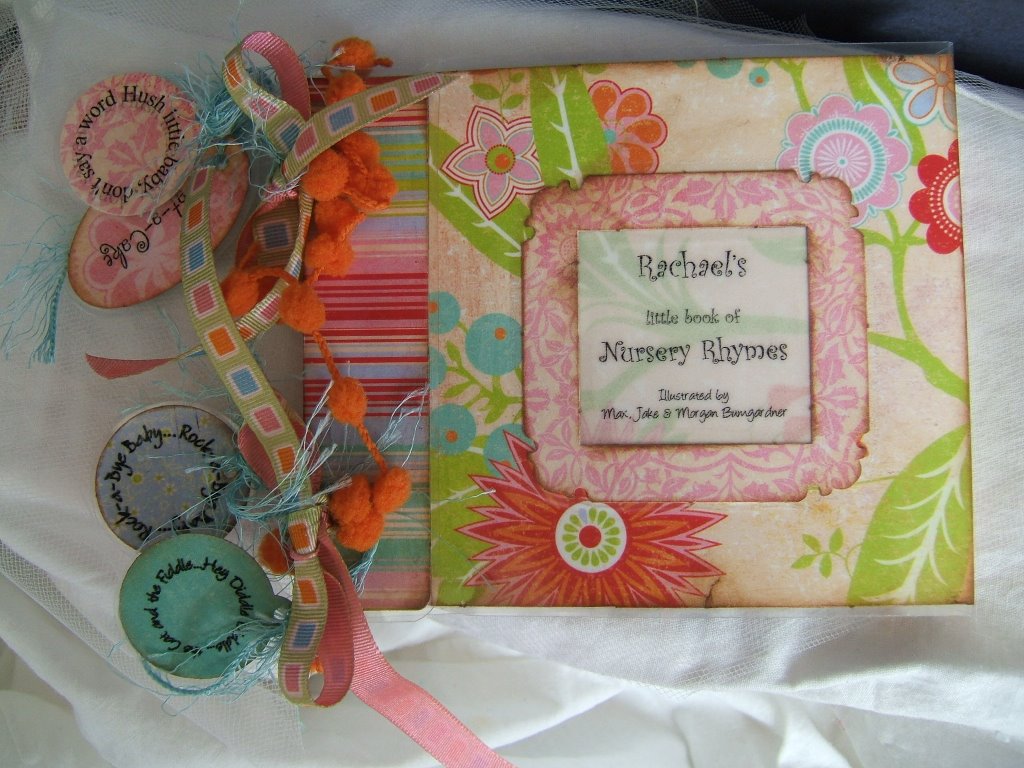
Here are a couple of the pages from inside:
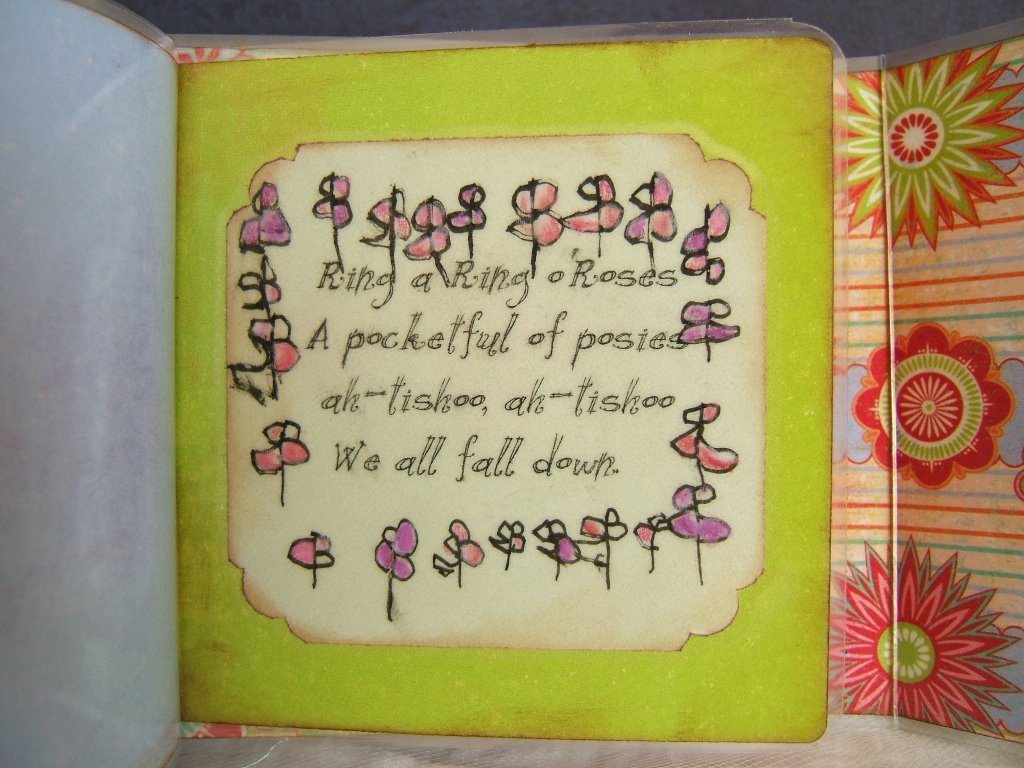
This one "Ring a Ring o' Roses" was illustrated by my 6 year old son.
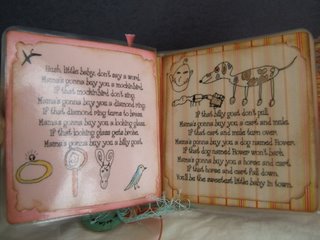
And this one, "Hush Little Baby" was illustrated by my 8 year old son.
It was such a fun project. Now, on to designing my Christmas cards!!!
Subscribe to:
Posts (Atom)

