
 Here is a wee kitty that I needled felted from alpaca wool. She's just the tiniest little thing, measuring about 2 inches long and 1 inch high. I used green glass beads for the eyes as well as the collar.
 Her tail is curling around the other side of her.
 This is the wool as I was washing it. Alpaca is so easy to work with, as you don't have to contend with lanolin - and it's super soft. No scratchiness that you may have with sheep wool.
  The last photo is when it is dry - but before being carded. OH - after I took the photos I remembered to add whiskers - tiny pieces of fishing line!
December 28, 2006
Petite Putty Tat
December 22, 2006
Laughing ALL the Way!!!
 OK - One of my goals in life is to make a real candy cane!!! A few years ago my dear SIL and I began this adventure. Today I tried again - by myself. I knew that working with 2 colors would be too much for me... so I ended up with a lovely shade of pink. :)
Alas, it is not to be.
As you can see I attempted to be really smart and try some ribbon candy as well. One (1), LOL, kind of resembles a ribbon... of sorts! I was happy with the tiny little spiral that I wound around a long wooden skewer, though!
Aly, I need you!!!
Transferred Love
 This is an album that I'm working on. It is chipboard, file style, and wire ringed.
I used the transparency rub-on technique to apply the album cover photo. I also used it to apply the titles to the file tabs. If you haven't used this technique - it's great!! You simply print out - mirror image - onto a piece of clear acetate.  Wait until the shininess of the ink is gone, then hold firmly onto the object that you want to transfer the image to. Rub with a bone folder until the image has transferred!
  It works great on tiny tags and other things that you can't send through a printer!
December 21, 2006
Tiny Friends

These are my wee needle felted wool bear friends that I created. If you are a felter, and have never needle felted, you must try it! It is so much fun to sculpt with wool! I used glass beads for the eyes, and wool and cotton thread and yarns to make the faces and hands/feet. They are all jointed.
Four more days...
December 20, 2006
New Look
Well... after a few pulled hairs, I was able to change the look of things a bit. I still need to figure out how to tweak a few things. I'm relieved that I didn't loose the whole thing when messing around with the html. Whew!!!
December 18, 2006
Busy Festive Weekend
 I started the weekend out having a candle lit dinner on Saturday night. It turned out beautifully. The photos just didn't do it justice. I wanted to get photos when it was dark, but by then I was running around too busy to think of it! I decorated the tables (seating for 24) with fresh greenery, bowls of caramel corn, almond brittle, nougat, cookies, and lots of candles. I also have a candle chandelier that was lit from above. With the candles burning and the Christmas tree lights on, the lighting was perfect! And who doesn't like edible center pieces!
The next day I decided to throw a surprise birthday party for my son - instead of waiting until the day before Christmas Eve to do it!! So, within 2 hours I had it all set up, including baking a cake and having everything ready! The cake is somewhat comical.  He wanted a snowflake cake this year - and working with a fresh out of the oven cake was a nightmare!!! I iced what I could, then sprinkled on the very forgiving coconut and edible glitter. He was very surprised!! Whew!! Now, I'm ready for Christmas!!
December 14, 2006
YoooooHooooo!!!!
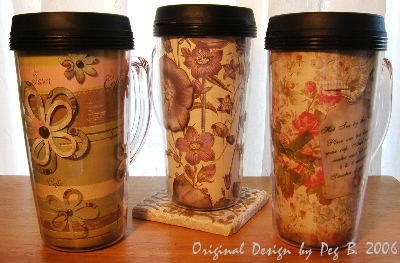
 Yes, this is another product review for the German made UHU adhesives! UHU was kind enough to send 2 types of their adhesive for me to try. I was sent the glue stick and glue roller. I have used them on several projects this week. Today I will showcase an accordion card file that I made.
 I used various papers, including bazzill - which I figured would be one of the toughest to test this glue out on. I was a bit unsure of using a glue stick. It's been years since I've used one on a project. In the end I was surprisingly pleased with the results. I used it to apply paper to the large areas - and it didn't buckle, and dried smooth.
 Here you can see the accordion folds - I used the roller to adhere each "folder". I applied eyelets and ran a ribbon through each "folder" so that it can be easily expanded.
 All in all I was pleasantly surprised at how well UHU performed!!

December 13, 2006
Spirited Fun
I don't know why I haven't tried the odorless mineral spirits and prismacolor pencils technique sooner! I love this!!  I have had the same set of prismacolors for at least 20 years. They still work great!
Basically, with this technique, you color in areas with the pencils, and then using rolled paper "tortillons" dipped in odorless mineral spirits, you blend. I found that using a different tortillon with each color family worked well. I kept finding myself trying to "rinse" each time in the spirits as if I were using a watercolor brush! LOL! If you don't color in the whole image, but instead color in the shaded areas, and then bleed the color out into the white areas, it will have a watercolor effect. 
Oh, and I was pleasantly surprised that the odorless mineral spirits were really odorless!! Another tip is to have a nail file handy to sand down the paper tortillon's as needed. Happy creating!
December 11, 2006
Croaking what?
 Croquembouch!!
 December 9, 2006
Be Merry!!!
 What a fun project this was!!
 I used wooden blocks - cut out from my father's scrap wood pile!
They are about 2"square. I covered them with paper from the TAC "Vintage Holiday" wing it collection. The letters I cut out with my cricut - Doodletype font. I used mod podge to adhere the paper on most of them. On some I used tacky glue, which worked just as well. I distressed the edges by sanding and applying a walnut stain. I applied ultra fine glitter to the B and the M as well as to the edges of the blocks.
Have a Merry Day!
December 8, 2006
Red & Green
 Two versions of a similar card. I used watercolor crayons on both. The faux nameplates are from the "hip hardware" TAC stamp set. I embossed them and then cut them out. Great set! I also used the paisley set to watermark the back ground with versamark. Pansy's are from the "flower collage trio" TAC set.
The colored background papers are Bazzill. 

December 7, 2006
Whimsical Ribbit
I just LOVE this little guy!! He's a great stamp from the "just smile" TAC stamp set. 
I used watercolors on him, and then cut him out! Those little feet and "fingers" took some time! The little cutter bee scissors worked great cutting them out. This is a tiny litte tag/card - about 2"x3".
December 6, 2006
Matchbook Magic
 These are some little matchbook style cards that I made as thank you's for customers. I'll add my sentiment on the back with sticky notes, so that they can use them! The snowflakes are glittered, and the postage stamp has crystal lacquer around it.
Love, love, love the "Vintage Holiday" Angel Company papers. They're delicious!!!
December 4, 2006
Snippin' Snowflakes
 Here is a snowflake tag/ornament that I made last night during a snowflake challenge! I filled some of the areas with crystal lacquer and sprinkled with glitter while still wet. I pierced the holes with a handy little piercing tool that I found on the notions wall of a fabric store! Here is a link to some great snowflake patterns:
http://www3.ns.sympatico.ca/dstredulinsky/samples.pdf
Now, if we would only get some REAL snow here!!
November 29, 2006
Holiday Swap Card
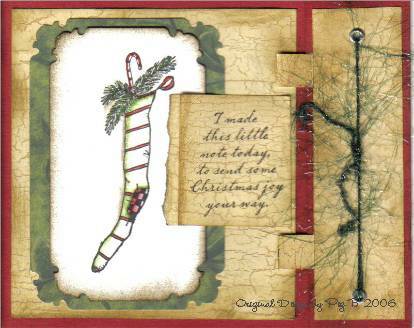 This is one of the cards that I recently made for an Angel Company swap. I can't wait to see the ones that I receive! I watercolored the stocking image (from the "Christmas Joy" TAC stamp set). It is a matchbook style card.
It's beginning to look a lot like Christmas!
November 26, 2006
Toot Tut(orial)
Thanks to everyone that has sent me great feedback on my watercolor tutorial!!
Now, I would LOVE to see your results!!!
Come on!!
November 22, 2006
Watercolor Crayon Tutorial
 OK - Here it is - my Watercolor Crayon Tutorial.
 Let me know if it makes sense!!
First - It is very important to stamp your image with an ink that will not end up bleeding when water hits it. Palette pads are great for this. If you're not sure if yours will work, just test a stamped image first by wetting it a bit and seeing if it bleeds. Also, using watercolor paper is ideal - but heavy cardstock will work fine as well.
First - It is very important to stamp your image with an ink that will not end up bleeding when water hits it. Palette pads are great for this. If you're not sure if yours will work, just test a stamped image first by wetting it a bit and seeing if it bleeds. Also, using watercolor paper is ideal - but heavy cardstock will work fine as well.
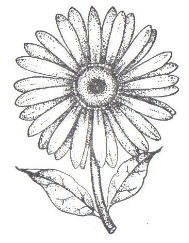
Next: I am using watercolor crayons from The Angel Company. I have found that I really like using the crayons versus the wc pencils. Much easier to blend without leaving a hard line on the paper.  The Gerbera Daisy stamp is also from The Angel Company. (Did I mention that I was a demonstrator for them?) :)
 The Gerbera Daisy stamp is also from The Angel Company. (Did I mention that I was a demonstrator for them?) :)
 Pick 2 colors - a light and dark - for your flower. Also, a light and dark for the stem and leaves. Using colors from the same family will work great.
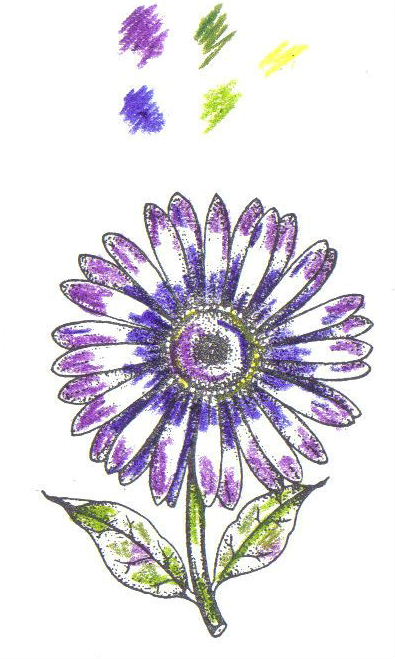
Start by applying the darker of the flower colors to the center of the petals. Don't be too careful - just scribble in. :) Apply the lighter color to the ends of the petals. Do the same with the leaves and stem. Keep the darker color to where the deeper veins and shaded areas are. As you can see in the flower at right - I added a touch of the flower color to the leaves.
Now we're ready for the fun!
 I used a 1/2 inch round watercolor brush. Starting on the petals: wet your brush - you want a wet, but not soppy brush. Start in the center white area of a petal. Using small circular motion head toward the end of your petal. When you hit color it should bleed back onto the wet white are you were just in. Go around doing the same with the other petals.
 Now, reverse what you just did - but work from the center of petal toward the center of the flower - working to blend in the darker crayon color. Add the same petal colors to the center of the flower and work those in as well.
Blend in the leaf and stem parts using the same technique.
TIPS: Make sure you use a light hand when blending in the crayons - make sure that you leave lighter (or even white) areas. Don't blend too much or you may end up with a muddy flower!!! Use darker colors in shaded areas.
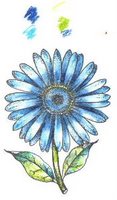
Below is a blue version using the same technique.
November 17, 2006
Gerbera, Gerbera, Gerbera...
 Try saying that five times fast!!
I've been playing with watercolor crayons and loving them! Here are a couple of cards that I may use for a workshop. I used the Angel Company gerbera daisy stamp. Stamped with noire Palette ink - then used 2 compatible watercolor crayons on each flower. Two greens on the leaves as well. Use the darker of the 2 colors you choose on the shaded parts of your image, and always try to keep white areas when using any watercolor technique!
Also, using the Palette stamp pads are great because they are a hybrid ink - "blending the best of dye and pigment into one ink pad" - they will not bleed when using watercolors over them!
The blue card has bazzill papers - It's hard to see, but I used VersaMark on the background with the same gerbera daisy stamp. The orangish gerbera has a delicious background paper from the country cottage designer paper collection - TAC.
Have a great weekend!!!
November 13, 2006
Hooray!!!
 I'm back! And the sale was a success!! I sold two thirds of what I brought!
I had a fabulous time visiting with friends that I hadn't seen for 20 years!
I had a few minutes to sit down and make these "hooray" froggy cards. They're mini's - only about 3"x4". The frogs are from an Angel stamp set - "Hoppy Frogs". The papers are from the "Pop Rockz" soar with it collection. Delicious papers!!
Have a great Monday!!
November 7, 2006
Off to the Races
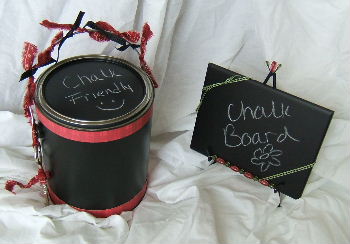 I think I have everything finished for the sale... I hope!! Here are my 2 last projects. They're not spectacular - but usable!! I put a chalk board finish on both!
I'm off for a few days to go to the sale... wish me luck!!! TTFN
November 3, 2006
Tagged
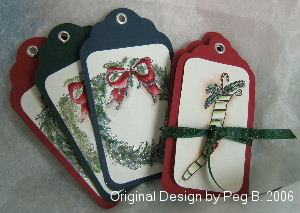 First up are the tags that I promised to show. I stayed up late working with a set of stamps that I borrowed so that I could enter a Christmas card swap using Angel stamps. I tried many different techniques, and decided that instead of throwing them away, to use the scraps for tags! I used watercolors on these.
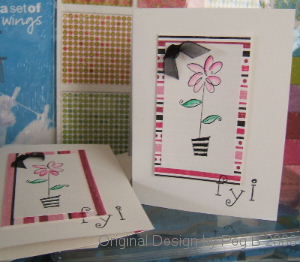 These are some simple cards that I made to send out to my friends to let him know that I am now an Angel Company consultant. I used the Impress markers to watercolor with - color out onto a plate or other non porous surface, then use brushes and water to pick up the color and use just like you're water coloring! The background paper is from a delicious line from TAC, "Uptown Girl". The flower stamp is from the set "Friendship Flowers". Fyi is stamped from the "Classic Alphabet" set.
I had such a fun time yesterday cutting out all of my new stamp sets! My fingers are a bit sore, but what's a little discomfort compared to all of the fun I'm having!!
November 2, 2006
Beautiful Fall
 I just love fall! The brilliant colors, and the crisp coolness in the air is just delicious!
I made this birthday card for my dear SIL Barb. Chipboard "B", a variety of cardstocks, a leaf sticker, and a green silk ribbon were used.
Today I'm in the Christmas mood... they had the "Santa Clause" movie on last night - I am so ready for the holidays!! I'll be working on Christmas tags today - I'll post a photo tomorrow!
October 30, 2006
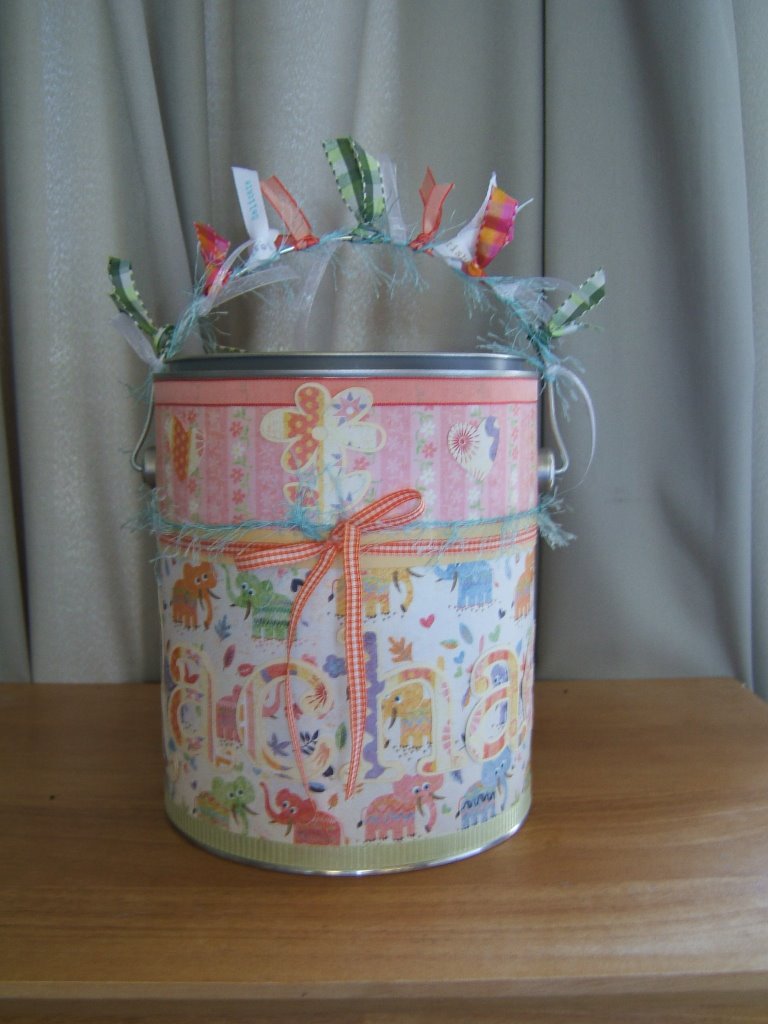
Baby Daze
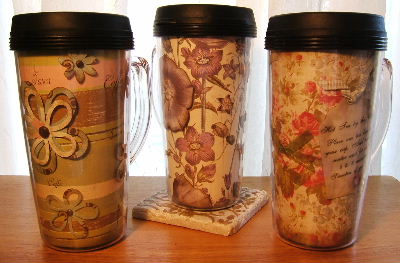
Here are a couple of cans that I made up today - Baby theme. I used a variety of papers and fibers. Cricut the letters, flowers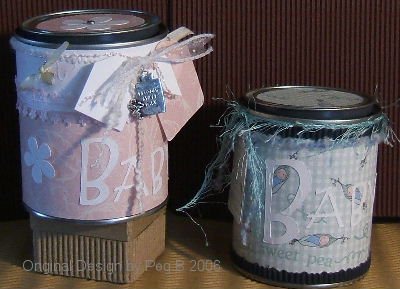 , and tags. I've found that using a spray adhesive to apply the main background papers works great. I would like to find a spray adhesive that doesn't have such awful fumes, though! Ick!! When I used Mod Podge for the first layer, I struggled with wrinkles and buckling. So, in the end I'm happy with the spray. To apply little letters I either run them through the Xyron, or use the Tombow Mono Multi liquid glue. Love that stuff.
Have a great Halloween tomorrow! I'm off to decorate!
October 29, 2006
An Apple a Day
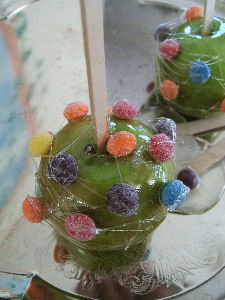 Ooooo... it's looking like fall!
Here are a couple of my projects I made today:
To the left are candied apples...
and below...
Homemade caramel-walnut-milk & white chocolate covered apples... Mmmmmmmmm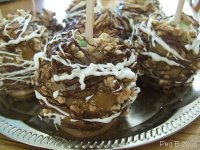
October 27, 2006
Clowns & Angels
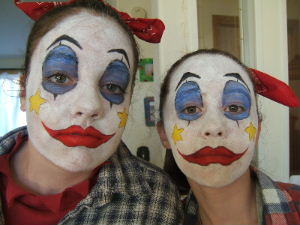 It's been an interesting week... a week of firsts. At the left is my first attempt at face painting. :) My dear friend's daughter and her friend went to a Halloween dance as rodeo clowns!! It was a fun learning experience doing their faces! I must say that they're much prettier under the makeup!
My other big first is something that I never dreamt that I would ever do. I signed on to be a consultant for a stamping/scrapping company - The Angel Company - TAC. I fell in love with their stamps and other goodies! I'm eagerly waiting on my first shipment of stamps and papers. I just can't wait to get them and start playing! One of the best things that have come out of this is that I met a new neighbor (an Angel) just a few streets away that helped me with my application process. I think that we'll have a lot of fun together in the future stamping and scrapping!
Have a great weekend!!
October 25, 2006
"Fall"ing For You
After doi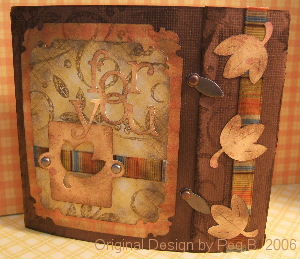 ng so many Christmassy things lately, I was feeling in the mood for fall last night. Cardstock is a chocolate Bazzill - love the texture of Bazzill... The leaves and "for you" are cut on my cricut. Distressed with my trusty walnut stain distress ink. The background stamp is a Stampin' Up stampin around - leaves and swirls. Ribbons were from the Target $ bin. :) Happy Fall!
October 23, 2006
October 22, 2006
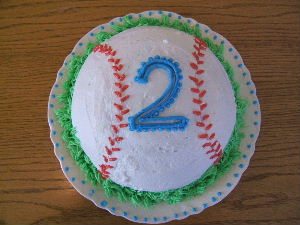
Bitty Baseballs & Burgers for the Birthday Boy
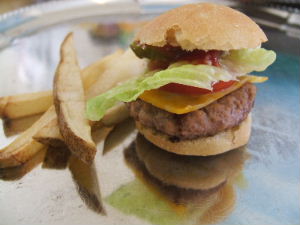
It was party day today for the 2 year old in
the house. I made miniature burgers - buns and all-, homemade fries and a baseball cake. The cake certainly isn't as detailed as most of my cakes, but for a bitty boy that loves balls, it was a hit! The surface is a bit "uneven"... a hem... little fingers just couldn't keep out of if!! I fixed it a couple of times before I remembered to take a picture! :)
I've been crazy busy working on projects for the upcoming craft sale. I'll post some of the goodies as I finish them.
October 20, 2006
Memories
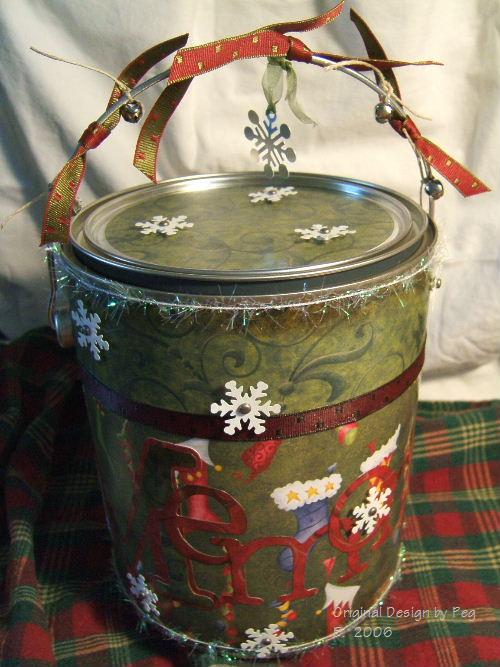 I had a heck of a time trying to get a decent photo of this can. I think it looks better in "real life". Oh well! I used patterned papers, ribbons, and other embellishments. I cricut the letters for "Memories" and used mod podge to seal it.
eToday was my baby's 2nd birthday. He's just growing up so fast. Always wants to do what his big brothers are doing... and many times does! I felt a bit sad today knowing that he is my last baby, and pretty much isn't a baby anymore! Thinking back to his birth brings back a lot of precious memories. He was my second home birth and it was near perfect. I'm one of those crazy gals that love giving birth. I spend 9 months sick and miserable, but when it comes to the birth I truly enjoy it!
Happy Birthday sweet boy.
October 18, 2006
Circle of Love
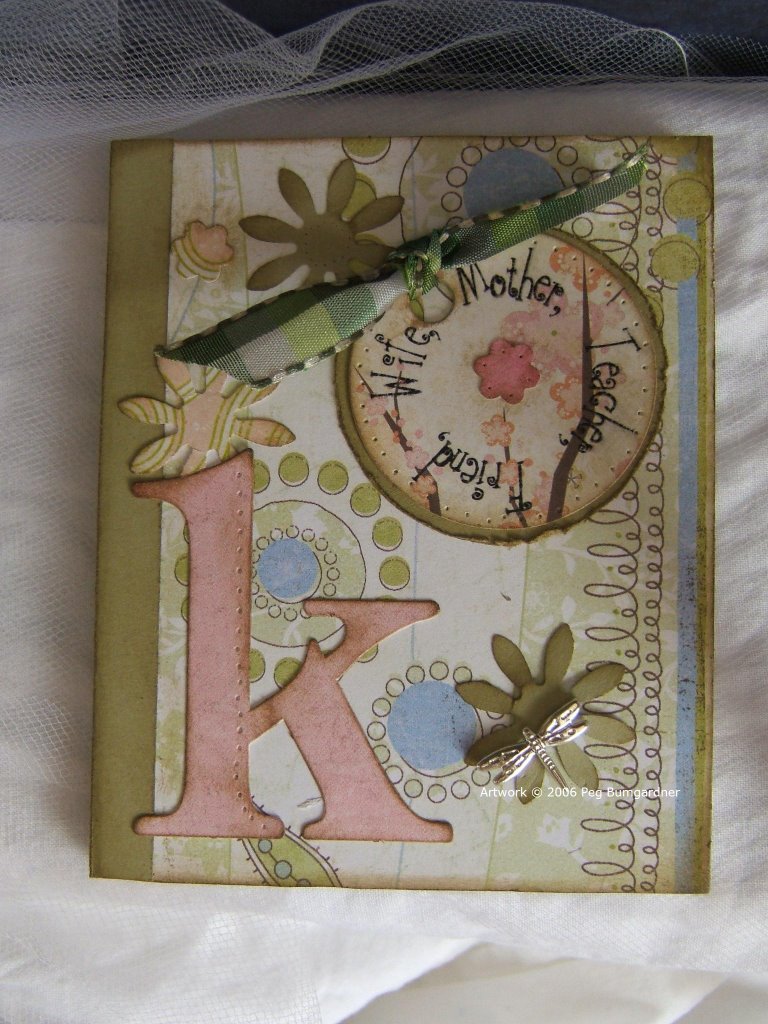
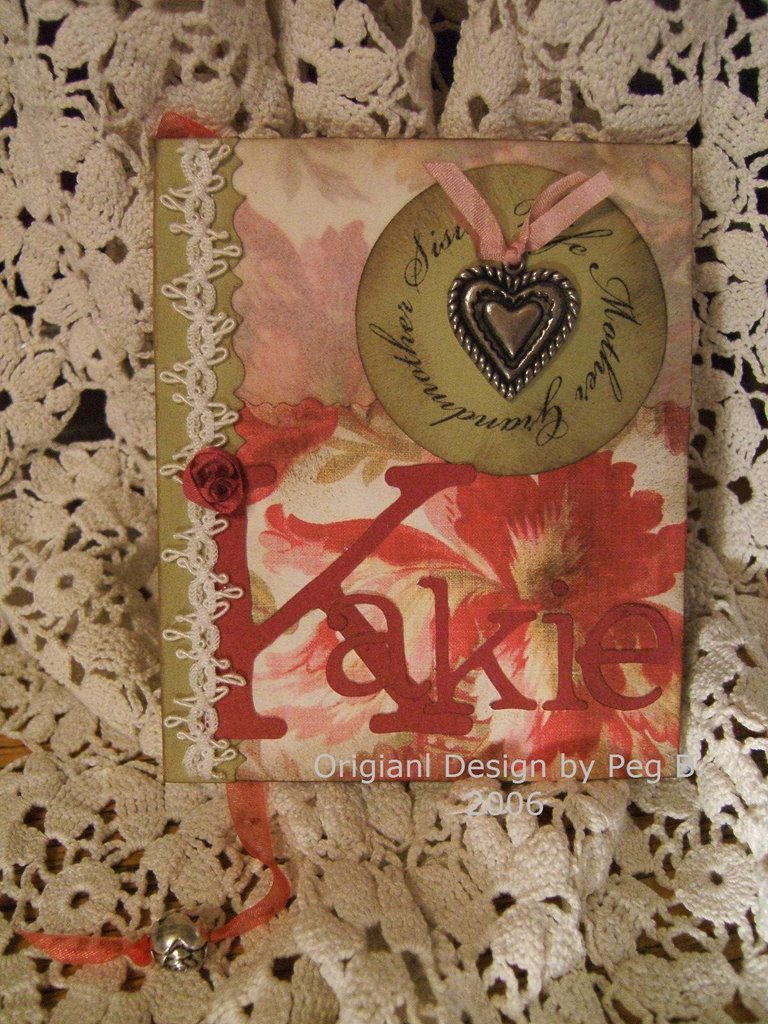 I worked on another miniature book today - commissioned by a friend for her Grandmother. I used a beautiful Anna Griffin floral paper, vellum, sage green & deep red card stock, 3 different fibers and a rose bead for the bookmark ribbon. The heart was a special piece that the granddaughter wanted included. I used my cricut with the doodletype font for the letters.
Well, I've agreed to be part of a craft sale in 3 weeks... I'm starting to think that I may be more than just a little crazy!
October 12, 2006
Tiny Alterations
 Altering these mini theme books are a load of fun! For this one I again used Basic Grey papers. Using the Xyron machine to run the components through first, makes it really quick and fun! Flowers were punched, and the monogram and tag were from BG. I used the printer made rub-on trick again on the tag. I distressed all edges with walnut stain distress ink. All in all it measures about 4 1/4 x 3 1/2.
October 11, 2006
Treasured Memories
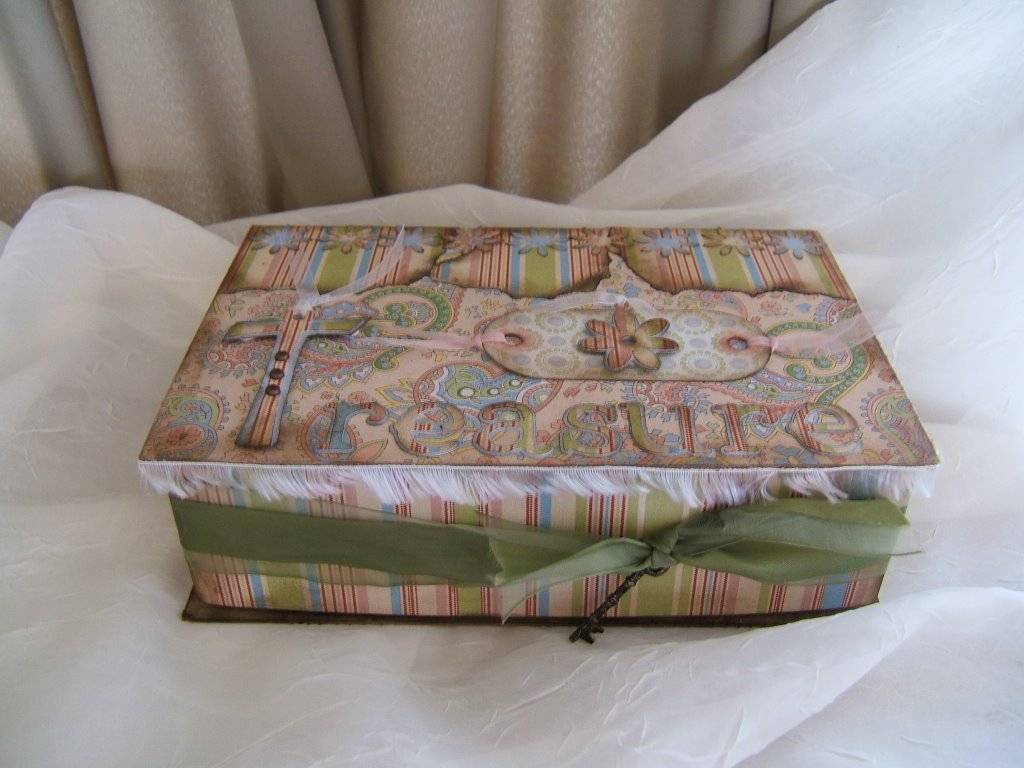 This is a special box that I've kept for many years. I finally decided that it was time to alter it's apearance, and use it. I received it from the man that
was the first one to ever give me chocolates for Valentines day. My dear Grandpa Ernie. :) I never knew either of my Grandfathers, and Ernie is my close friends Grandfather. So, I adopted him. I altered the box with Making Memories papers, fibers, and cut the letters out with my Cricut.
It's time to start another busy day! This is Max's art class day. He's taking a 2 hour art class every week at a local art studio. He's loving it!
Have a terrific Tuesday!
October 10, 2006
Birthday Fancies
 Here is my latest project.
It was created with Basic Grey papers, various ribbons, and lettering done by my beloved Cricut. It was such a fun project for my dear friend's daughter who just turned 1. Happy Birthday Rachael!
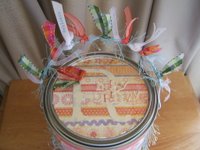
And what might be in the pail? Well, with 3 of my son's help we made a nursery rhyme book - illustrations done by them. I used a Basic Grey matchbook kit, along with ribbons and tags. I used a technique of making my own rub-ons for the first time. I just love the possibilities of it. I used it on the little tags hanging from the book. If you haven't tried it, basically all that you do is print a mirror image onto clear acetate, wait a few minutes, and then rub it onto your paper. 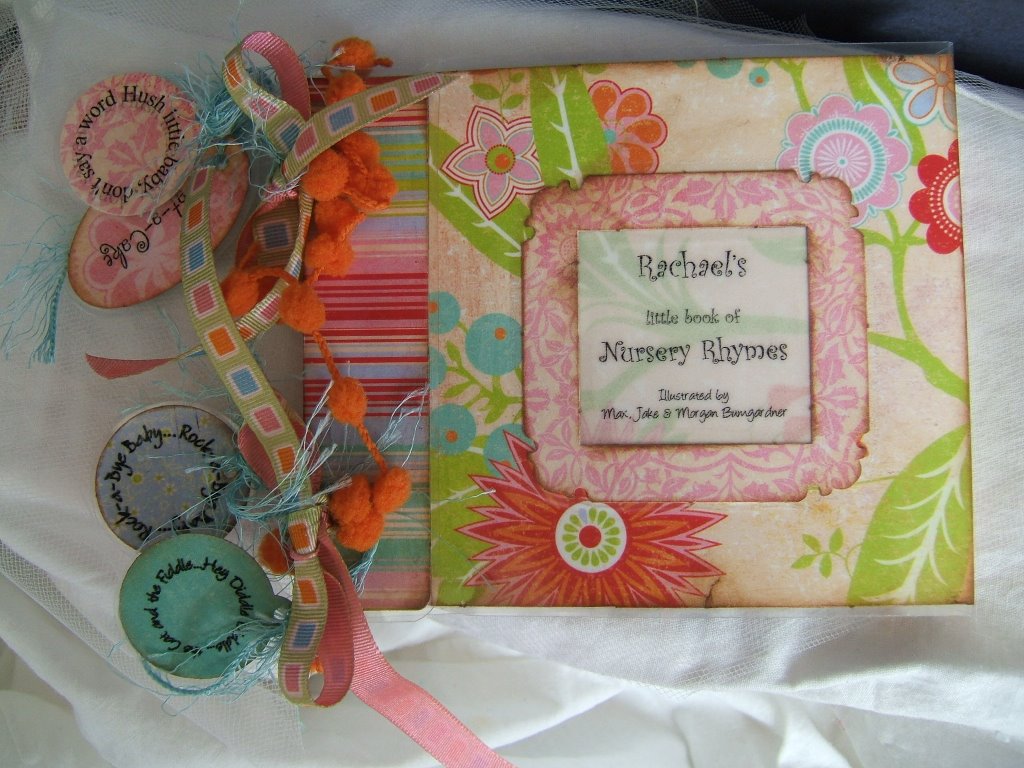
Here are a couple of the pages from inside:
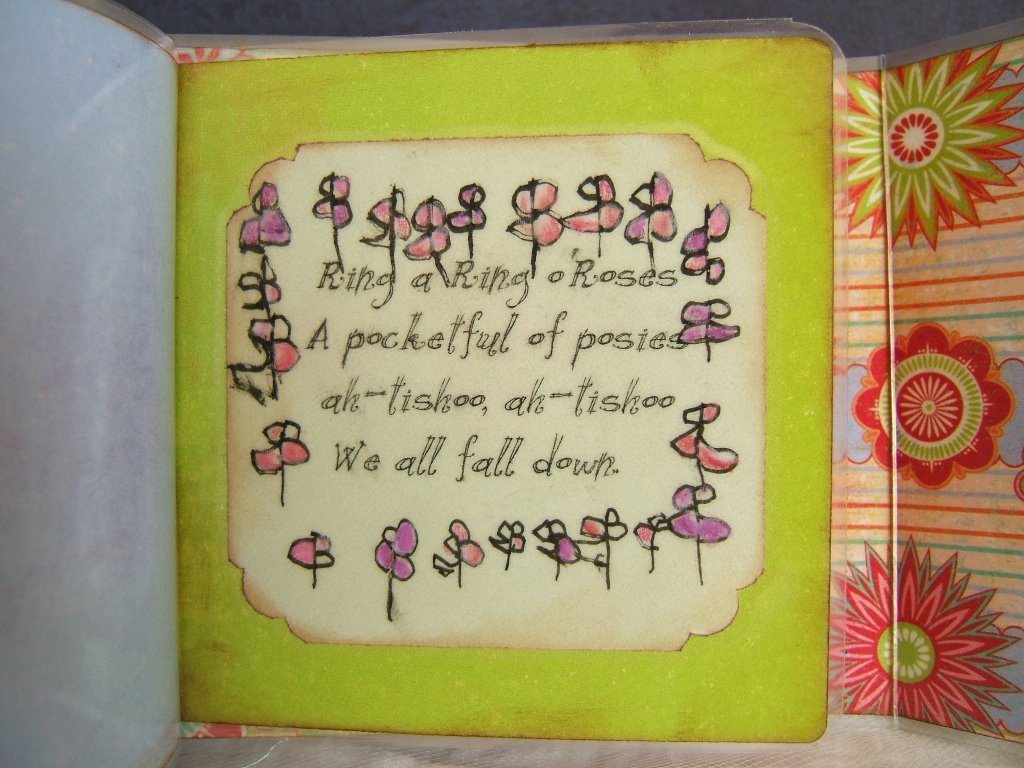
This one "Ring a Ring o' Roses" was illustrated by my 6 year old son.
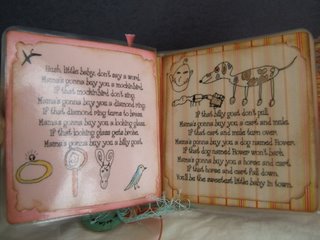
And this one, "Hush Little Baby" was illustrated by my 8 year old son.
It was such a fun project. Now, on to designing my Christmas cards!!!
Subscribe to:
Posts (Atom)

